Staying home for Spring Break? Do you need some activities to keep your kids busy during the week, or maybe you need some gift ideas for your family? Perhaps you are looking for some crafts for your children to remind them about the true reason we celebrate Easter. Miss Langellier and Mrs. Hartwig share their favorite craft ideas to celebrate the new season.
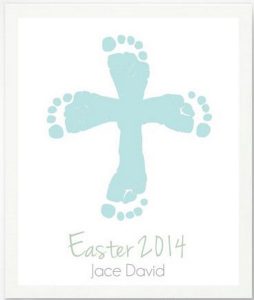
- Easter Cross – Craft idea provided by Traci Langellier via
http://pinklover.snydle.com/easter-crafts-for-kids.html
- Supplies: White cardstock, washable tempera paint or large washable inkpad, sponge to apply paint, marker, and your child for the footprint.
- Directions: First, use your marker to write Easter, the year, and your child’s name at the bottom of the paper. Next, paint your childs foot but beware of a kicking foot due to tickles. Last, place child’s foot on cardstock to make a cross.
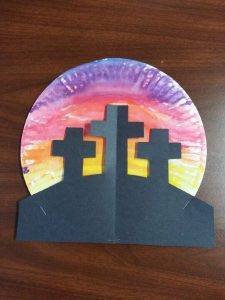
- Easter Cross Paper Plate – Craft idea provided by Traci Langellier via
http://pinklover.snydle.com/easter-crafts-for-kids.html
- Supplies: Paper plate, black construction paper, paint in purple, red and yellow, paintbrush, marker, scissors and glue.
- Directions: First, with your black construction paper draw out three crosses upon a hill and have your child cut out. Second, with your three paint colors, have your child paint them onto their paper plate. After the paint has dried, your child can glue their cross scene on top of the paper plate.
- I like to read “The Sun Stops Shining” from the Jesus Storybook Bible by Sally Lloyd-Jones when we do this craft.
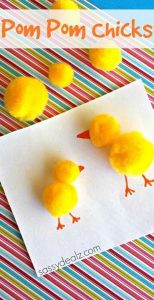
- Pom Pom Chicks – Craft idea provided by Traci Langellier via
http://pinklover.snydle.com/easter-crafts-for-kids.html
- Supplies: Cardstock cut into quarters, Yellow pom pom’s sizes large, medium and small, orange marker (fine point), and glue.
- Directions: For the larger chick, have your child glue the large pom pom onto the cardstock for the body and the medium pom pom for the head. For the smaller chick have your child glue the medium pom pom to the cardstock for the body and the small one for the head. Then, after the glue dries, they can use the orange marker to draw legs and a beak.
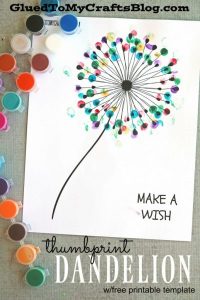
- Dandelion Thumbprints – Craft idea provided by Traci Langellier via http://www.gluedtomycraftsblog.com/2016/07/thumbprint-dandelion-kid-craft-wfree-printable.html
- Supplies: White construction paper, black marker, and a variety of washable tempera paints.
- Directions: First, you or your child draw a dandelion with a stem or print the template provided on the website from above. Next, have your child dip their thumb into paint and press it down on the tip of the dandelion.
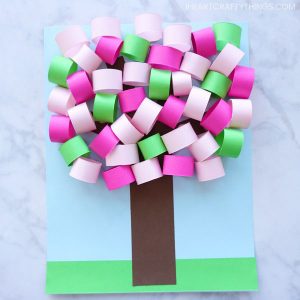
- 3-D Spring Paper Tree – Craft idea provided by Traci Langellier via https://iheartcraftythings.com/3d-spring-paper-tree-craft.html
- Supplies: light blue, brown, light green, pink and dark pink card stock, paper cutter, glue stick, and tacky glue.
- Directions: First, cut out a rectangle from your light green cardstock for grass. Glue it onto the bottom of your light blue cardstock. Then cut out a tree trunk and branches from your brown cardstock and glue them onto your light blue cardstock. Next, Use a paper cutter to cut out strips of pink, dark pink and light green cardstock that are 3/4-inch by 4 1/4-inches. You will need anywhere from 40-50 of these paper strips. Then, Use your glue stick to add some glue to the end of a paper strip and then fold it into a circle, gluing the two ends together. Continue folding and gluing all of the paper strips into circles. Last, add a dot of Tacky Glue onto the bottom of a paper circle and then glue it onto the branches of your spring tree. Continue adding glue to each paper circle and then glue them around all of the branches of the spring paper tree craft.
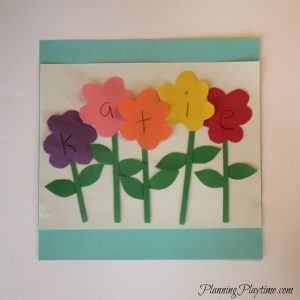
6. Flower Names – Craft idea provided by Angela Hartwig via https://planningplaytime.com/preschool-name-crafts-2
- Supplies: Flower cutouts with letters of your child’s name wrote on them, green and white construction paper and a piece of paper or nametag with your child’s name wrote on it for them to look at.
- Directions: First, you will need to write your child’s name onto the flowers. Try having them do this themselves first. Next, have them assemble and glue their flowers down. Last, have them glue their flower stems and leafs onto their paper.
- This craft is great because it incorporates name recognition.
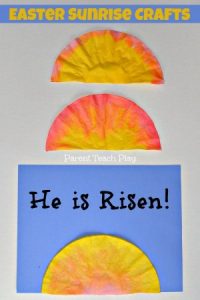
7. Easter Sunrise – Craft idea provided by Angela Hartwig via https://sweettmakesthree.com/easter-crafts-for-preschoolers/
- Supplies: coffee filters, yellow and orange food coloring, two Dixie cups and a pipette
- Directions: First, tell the story of Easter and why we celebrate it. Write on your blue construction paper, “He is risen!” Set up your workspace with an old towel and a tray underneath. Cut the coffee filter in half (you can even have your child do this just draw the line for them to cut on). Prepare your colors by mixing food coloring with water. Have your child use the pipette to suck the colored water out of the cups and apply it to the coffee filter to create a sunrise effect. Last, allow the coffee filter to dry and glue it to the paper.
- Having a craft or activity with a Bible story makes the Bible story real and fun for them!
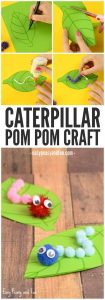
8. Pom Pom Caterpillars – Craft idea provided by Angela Hartwig via https://www.easypeasyandfun.com/caterpillar-pom-pom-craft/
- Supplies: Green leaf cut outs, pom poms, googly eyes.
- Directions: Draw a leaf on green construction paper or cardstock, have your child cut the leaf out or cut it for them. Last, have them put a line of glue on the leaf to assemble their caterpillar.
- This craft is fun when learning about butterflies!
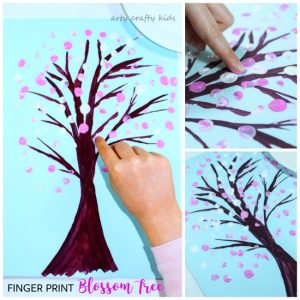
9. Blossom Tree – Craft idea provided by Angela Hartwig via https://www.artycraftykids.com/art/finger-print-spring-blossom-tree/
- Supplies: print out of a tree onto blue cardstock and pink paint is all you need for this craft!
- Directions: Have your child dip their finger in pink paint and dot it on the tree to make a cherry blossom tree.
- This craft can be a keepsake with their sweet fingerprints on it!
10. Paper Plate flowers – Craft idea provided by Angela Hartwig via https://www.theresourcefulmama.com/paper-plate-flower-craft-for-kids/
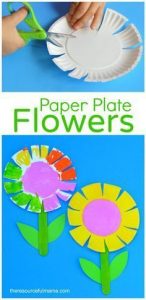
- Supplies: Children’s scissors, paper plates, leaf cut outs for flower stems, paint and Popsicle sticks.
- Directions: First, draw lines on the plate for your child to cut then have them cut along the lines. After they have finished cutting, have them paint the plate and Popsicle stick. Last, once their plate has dried have them glue the Popsicle stick and leaf onto the plate to complete their “flower”.
- This craft is great because it doubles as scissor practice along with a cute spring craft!
Thank you for reading about more of our favorite crafts! If you’d like more ideas, you may enjoy our other craft themed posts below.